Here is a quick overview of the steps required to set up Primero on a linode server using Chef. It is structured into tasks to be completed on the Linode virtiual machine and then tasks to be completed on a local machine (like a laptop)
Each section will be explained in detail.
Overview of Linode Tasks (from now on this will be referred to as the target machine)
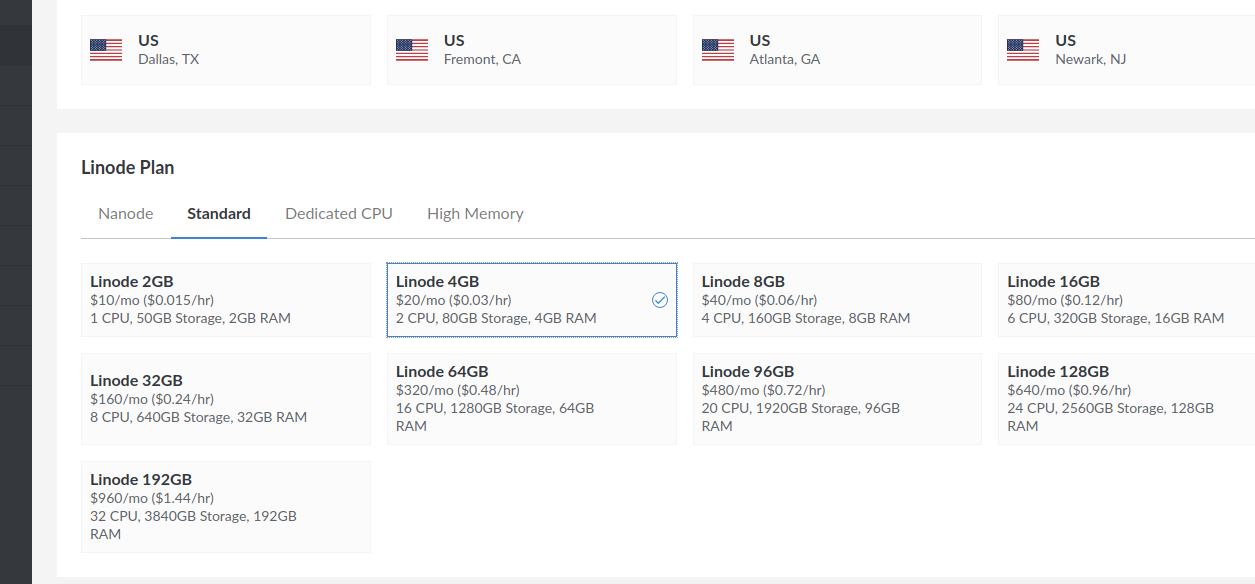
- Log in to Linode and set up a small virtual machine (recommended is a 4GB instance) running Ubuntu 16.04 LTS.
- Create a user on the target machine with passwordless sudo access
- Set up DNS so that a domain name resolves to the target machine
- Install a digital certificate based on the domain name using the certbot application created by Lets Encrypt. If you use the
"recipe[primero::letsencrypt]",in your json configuration (explained later) then chef will do this for you
Overview of Local Tasks (from now on this will be referred to as the deployment machine)
- Install Chef and Knife
- Clone the Primero repository and make sure your public SSH key has been added to the github repository
- Create a configuration file for Chef and run the config file using chef
Tasks on the target machine
Log in to Linode and set up a linode running Ubuntu 16.04 LTS.
- Create a linode using the web interface
_ Note that the version of Ubuntu is important_
After that completes note the SSH access details (like ssh root@xxx.xxx.xxx.xxx ) on the Linodes tab in the Linode interface.
Create a user on the target machine with passwordless sudo access
- Using a Terminal log in using the SSH details noted above. Create a new user
root@machine:~# adduser <user>
Give this new user access to sudo
root@machine:~# adduser <user> sudo
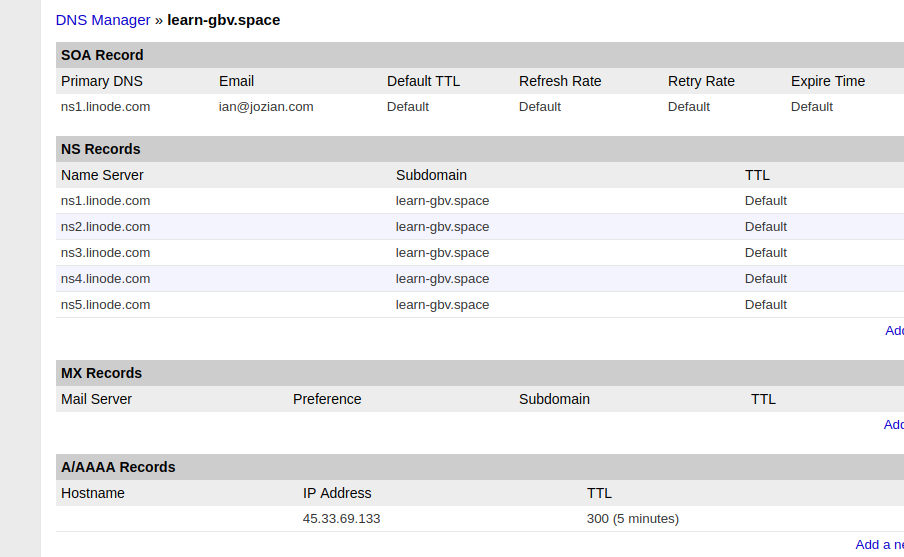
Set up DNS so that a domain name resolves to the target machine
- Add a Domain Zone on Linode.
The IP address if the machine you just set up must point tot the domain and the nameservers also need to resolve
Tasks on the deployment machine
Copy your ssh ID to the target machine
ssh-copy-id @xxx.xxx.xx.xxx
Install Chef and Knife
Open a terminal and do
$ wget https://packages.chef.io/stable/debian/6/chefdk_0.9.0-1_amd64.deb
$ sudo dpkg -i chefdk_0.9.0-1_amd64.deb
$ chef verify
$ chef gem install knife-solo --version 0.4.3
Note that the version number of chef is important
Clone the Primero repository and make sure your public SSH key has been added to the repository
Copy your public ssh key using
$ pbcopy < ~/.ssh/id_rsa.pub
and paste it into the ssh keys on github. Then clone the repository using
$ git clone https://github.com/primeroIMS/primero.git
Create a configuration file for Chef and run the config file using chef
In the cookbook folder of the checkout there is a file called dev_node.json which is an example configuration file for chef. Paste appropriate certificates and keys for couchdb and the deploy key
Here we are deploying the maint_1.6 branch with unattended upgrades and a lets encrypt certificate. These are called recipies (there are others available)
{
  "couch_db": {
    "config": {
      "httpd": {
        "bind_address": "0.0.0.0"
      }
    }
  },
  "primero": {
    "environment": "dev",
    "rails_env": "production",
    "server_hostname": "somehost.com",
    "no_reseed": false,
    "git": {
      "repo": "<your git repo>",
      "revision": "maint_1.6"
    },
    "letsencrypt": {
      "email": "your@email.com",
      "couchdb": true
    },
    "couchdb": {
      "password": "",
      "ssl": {
        "cert": "",
      "key": ""
      }
    },
    "deploy_key": "",
    "ssl": {
      "crt": "",
      "key": ""
    }
  },
  "unattended-upgrades": {
    "send_email": true,
    "email_address": "primero_support@your.org",
    "auto_reboot": true
  },
  "run_list": [
    "recipe[primero::default]",
    "recipe[primero::letsencrypt]",
    "recipe[chef-unattended-upgrades::default]"
  ]
}
Make sure you copy the certificates exactly (without spaces for example). A useful command is this for example
awk 'NF {sub(/\r/, ""); printf "%s\\n",$0;}' couch_ca.cert
After this is done run the deployment command (from the cookbook folder)
ssh user@xx.xx.xx.x 'which chef-solo' || knife solo prepare --bootstrap-version=11.10.4 user@xx.xx.xx.xx
knife solo cook user@xx.xx.xx.xx dev-node.json
Note that if you want to deploy a branch which is not the latest this is (maint_1.6 at the time of writing) then you need to run chef from the branch you want to deploy. For example this is for the 1.5 release
git checkout --track maint_1.5/maint_1.5
and then
knife solo cook user@xx.xx.xx.xx dev-node.json